prerequisites:
Valid Domain Name
Fresh linux server install –> Cool Article / SSL Certificate (for encrypted DNS)
Ability to map network ports from your router to your server
Take notes as you progress through this process. It works great on my computer, with Ubuntu linux, in my larger network configuration. You may need to make adjustments to this process for it to be successful for you.
developer: AdGuardHome
AdGuard is a Self-Hosted DNS server that will enlighten you on how often and how much private information is being shared by the devices and services in your home to device manufacturers, software developers, and other audiences. Out of the box, once basically configured, the internet is different, ad-wise. The targeting is far less precise in the ads that I see being delivered to me.
AdGuard is very easy to install.
Installation is a snap, do not run as root. You will be bumped for sudo creds when you execute the command below:
curl -s -S -L https://raw.githubusercontent.com/AdguardTeam/AdGuardHome/master/scripts/install.sh | sh -s -- -v
Once the installation is complete, your admin console is available at http://<your_IP>:3000
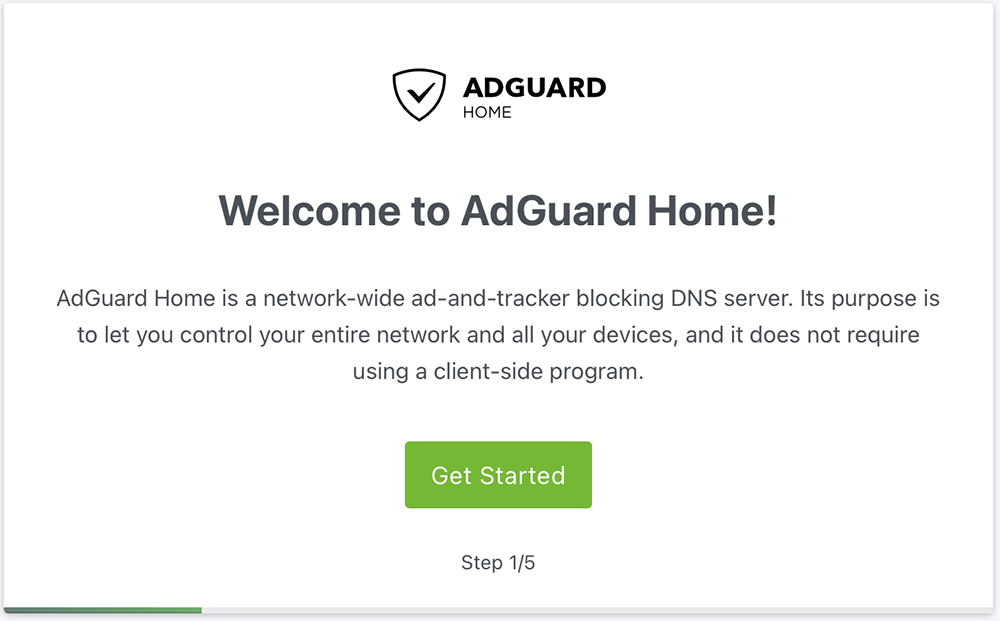
Click on Get Started to continue 🙂
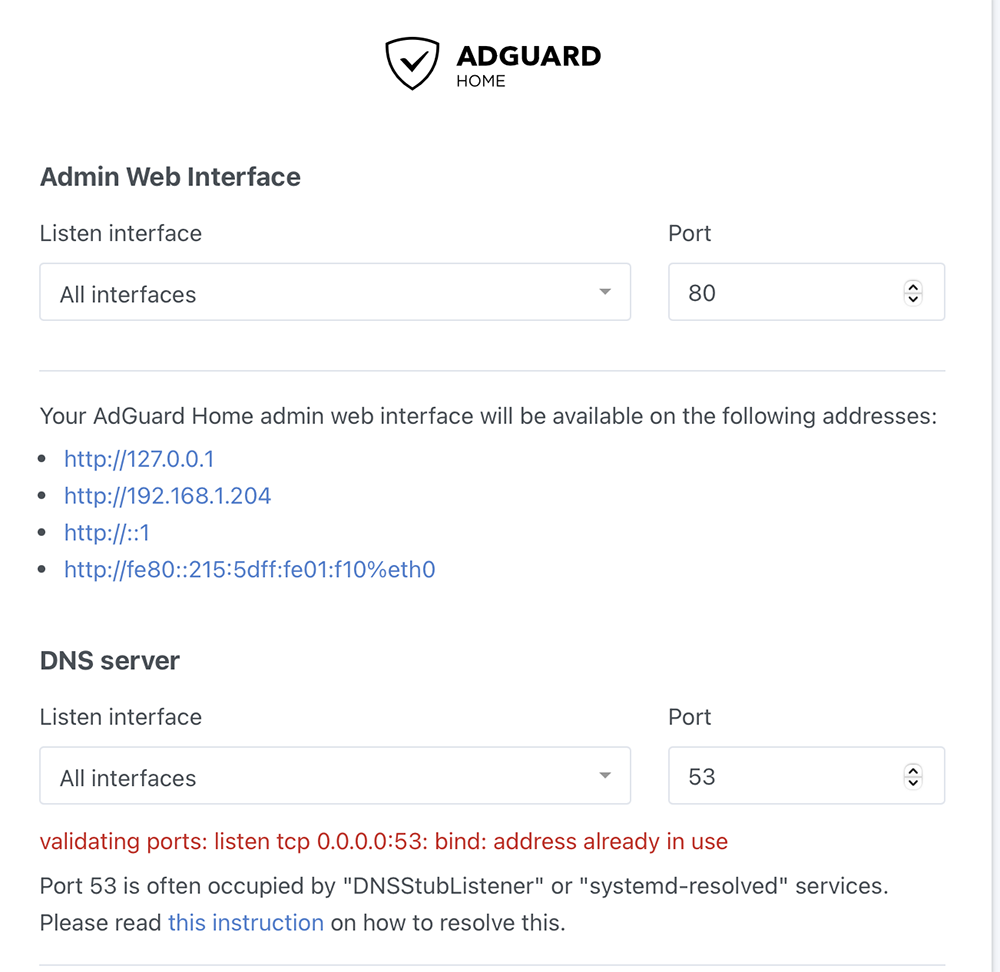
AdGuard wants to utilize port 53 which is assigned to DNS activities. Follow these instructions to remedy this conflict.
1. Create the /etc/systemd/resolved.conf.d directory, if necessary:
sudo mkdir -p /etc/systemd/resolved.conf.d
2. Deactivate DNSStubListener and update DNS server address. To do that, create a new file, /etc/systemd/resolved.conf.d/adguardhome.conf, with the following content:
sudo nano /etc/systemd/resolved.conf.d/adguardhome.conf
### Begin
[Resolve]
DNS=127.0.0.1
DNSStubListener=no
### End
FYI: Specifying 127.0.0.1 as DNS server address is necessary because otherwise the nameserver will be 127.0.0.53 which doesn’t work without DNSStubListener.
3. Activate another resolv.conf file:
sudo mv /etc/resolv.conf /etc/resolv.conf.backup
sudo ln -s /run/systemd/resolve/resolv.conf /etc/resolv.conf
4. Restart DNSStubListener:
sudo systemctl reload-or-restart systemd-resolved
Click refresh and then Get Started again and configuration can continue.
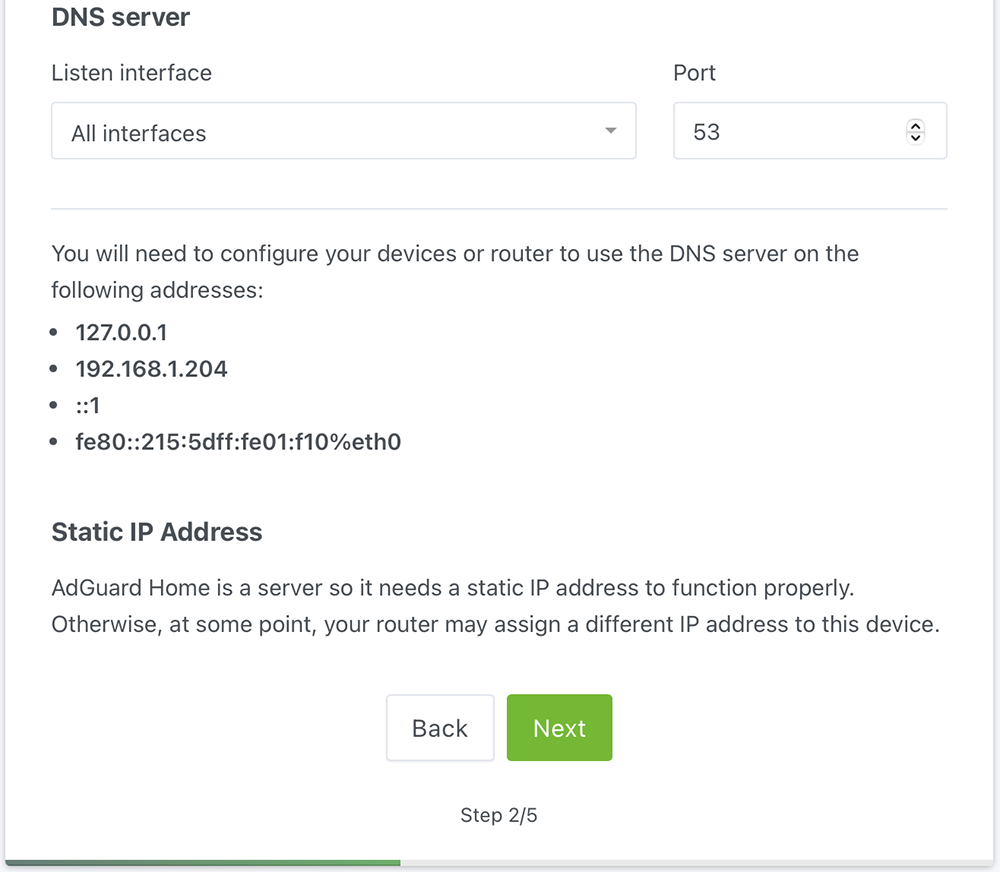
Note that the port 53 conflict is resolved. AdGuard also requires a static IP so if you didn’t you would have to assign the IP via a DHCP reservation, if that is the case I refer you to your equipment manual.
Click Next
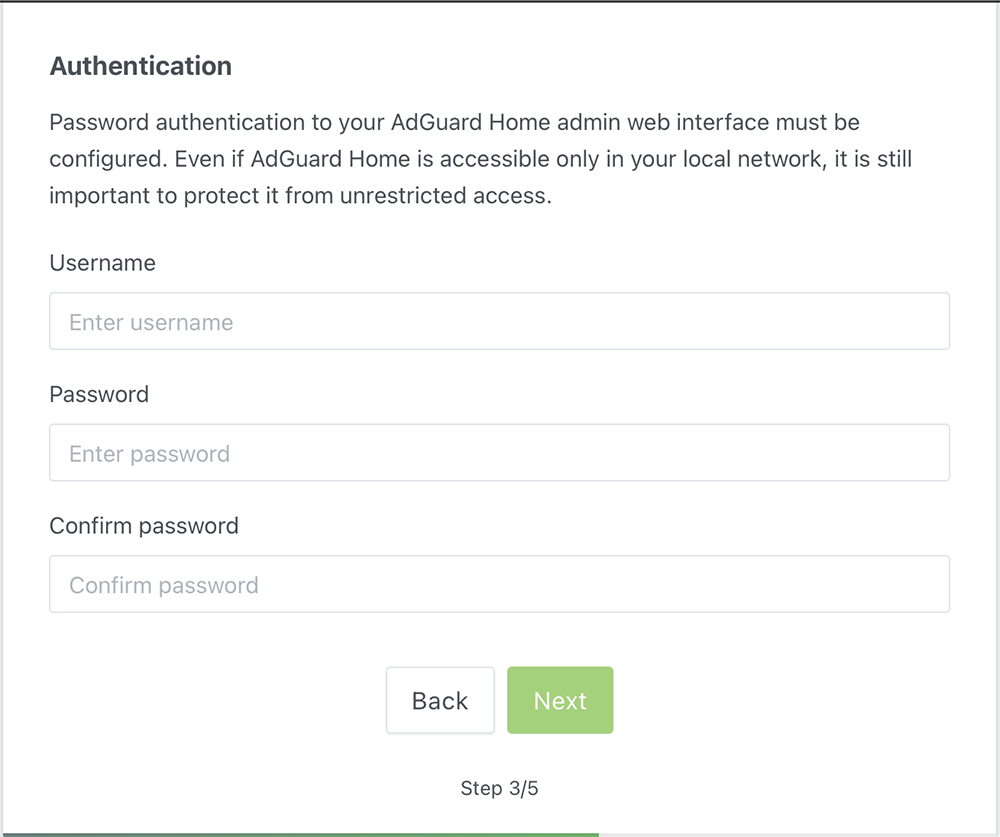
Create your admin credentials and continue
Important first steps, for me anyway, is to restrict this DNS server to my local network and then continue configuration. Click on Settings and select DNS Settings

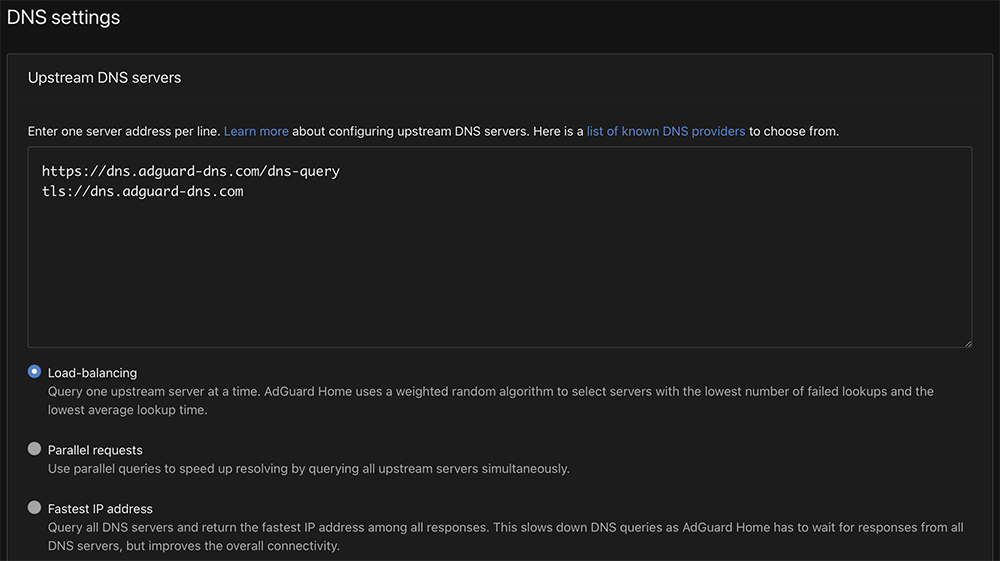
Upstream DNS servers are used to support domain name resolution. –>Click Here<– And you can select the upstream DNS server that best fits your needs. They are not all the same. I use the Load-balancing query model, but that may not fit your network model.
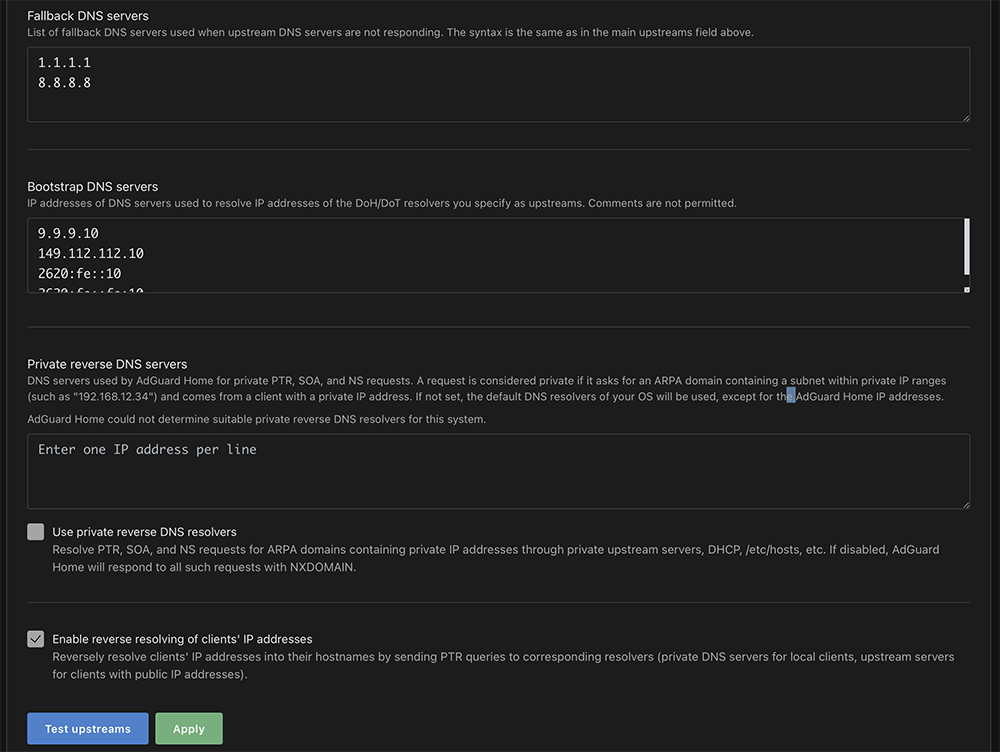
Fallback DNS servers step up when your preferred upstream DNS servers are not responding. Bootstrap? –>Click Here<– I leave the rest at the default. Scroll down and click on Test upstreams. If all the upstream tests pass, click apply.
This is the section where you can restrict access to your DNS server. If an entry is made in the Allowed clients field all other clients are denied. I enter 192.168.1.0/24 in Allowed clients and Save the configuration. This allows my local lan access to the DNS server which also means everyone else is denied.
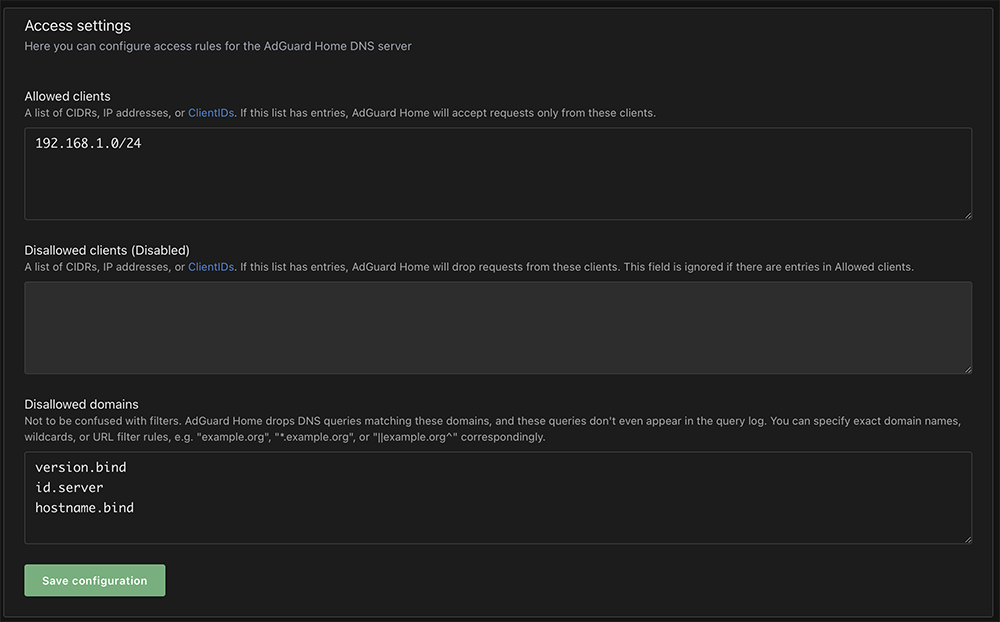
The important concern regarding allowed/disallowed clients is if there are no restrictions on who can use your server anyone can use it.
Lastly, installation of the SSL certificate. I have not have any positive experience with Let’s Encrypt or similar services to generate an SSL certificate. My projects are public facing and I prefer purchasing the SSL certificate from a certificate authority. Mainly, it ensures that connections to my website are encrypted and the SSL certificate sources are trusted.

Under Encryption settings, enabling encryption will secure communications in the admin console.

You can either paste in the contents of your certificate and private key or you can link to where they are saved in your server. Once those minimum settings are configured and you click Save Configuration you will need to reload the admin console with https:// so make sure you have opened the associated ports in your firewall.


Final notes. There are a lot of customization options in the configuration of your self-hosted AdGuard Home server. If you are using virtual machines and are able to checkpoint your server I would recommend doing so when making major changes. This makes is much easier to roll-back failed configuration changes. Don’t forget to forward needed ports to your server if you plan on using this DNS server while yo are away from home. I deploy OpenVPN on my phone and laptop so I do not need all the ports opened.

Leave a Reply